XYZ positioning system for automated inspection - wafer / probe cards (clean room) | Stroke 720 x 720 x 100 mm
Inspection and Mikroscopy
782300:148.26.oem
High-precision quality inspection for cleanroom applications
This inspection system (shown here without cover) is specially designed for automated quality control of large wafers, probe cards and printed circuit boards. A high-resolution camera or sensor in Z is movable relative to the sample or carrier on the linear stage. Operation is controlled by a separate motion controller for the three axes.
Increased throughput by automated 24/7 inspection
|
|
|
|
Optionally expandable:
|
Individual extensions and customizations
Engineering services include the fitting of the systems to your structure and the desired controlls. Furthermore, we develop prototypes and like to adapt the systems to the environmental requirements of your application particle emission, radiation, temperature, precision special parts manufacturing, working height, collision protection, safety concept, compensation factor and filter, sensor mounting, brake, decoupling, special lubrication, special colors, holders, adapters, special motors with pharmaceutical approval, comprehensive documentation, test protocoll, llife cycle testsFields of application
Inspection of large wafers, probe cards and printed circuit boards, AOI, quality assurance, microscopy of large sample, surface inspection, measurement of chip, measurement of objects on complicated geometric shapes
782300:148.26 | X | Y | Z | |
| Standard system used | PMT290-EDLM | PMT290-EDLM | ||
| Travel | [mm; deg] | 820 | 820 | 100 |
Repeatability unidirectional | [µm; deg] | ± 0.3 | ± 0.3 | ± 1.5 |
Repeatability bidirectional | [µm; deg] | ± 0.4 | ± 0.7 | ± 2.5 |
[mm/s; deg/s] | 750 | 750 | 150 | |
| Max. speed | [mm/s; deg/s] | 1500 | 1500 | 300 |
Max. Load | [N] | 150 | 150 | ± 200 |
Motor |
|
|
| AC Servo |
Drive |
|
|
| |
Feedback |
|
|
|
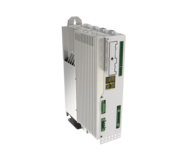
FMC 300
Installation module for dynamic applications and high loads and voltage.

FMC400/450
Multi-axis controller fully ready for tracking, simple creation of own programs.
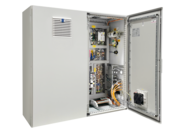
PLC
We support integration of our systems into PLC architectures, e.g. Beckhoff
ACS
We support integration of our systems into your ACS environment
Are you looking for a technical solution for your application?
Get your first 3D Design in a few days:
Katja Weißbach
Consulting
T +49 351 88585-64
E-Mail
Ronald Schulze
Consulting, Project Management & Engineering
T +49 351 88585-67
E-Mail

Francisco Samuel
Consulting &
Project Management
T +49 351 88585-85
E-Mail

Elger Matthes
Consulting, Concepts, Innovation & Engineering
T +49 351 88585-82
E-Mail
Our references
