8-axis positioning system / goniometer for analytics, inspection | XYZ stepper motor, ball screw | Phi Theta Omega stepper motor, belt
Combinations of laboratory axes
782335:009.26
High-resolution inspection from 8 angles
This 8-axis positioning system makes it possible to analyze and inspect various sample geometries and other parts. Both cameras / sensors can be tilted above the sample and adjusted in height. In addition, the specimen carrier can be erected by tilting it parallel to the measuring surface to compensate for differences between individual specimens. XY Rz positioning allows the specimen to be evaluated from any angle in spatial radiation pattern by the customized camera.
Compact positioning solution with optimized price-performance ratio
|
|
|
|
Optionally expandable:
|
Individual extensions and customizations
Engineering services include the fitting of the systems to your structure and the desired controlls. Furthermore, we develop prototypes and like to adapt the systems to the environmental requirements of your application particle emission, radiation, temperature, precision special parts manufacturing, working height, collision protection, safety concept, compensation factor and filter, sensor mounting, brake, decoupling, special lubrication, special colors, holders, adapters, special motors with pharmaceutical approval, comprehensive documentation, test protocoll, llife cycle tests
Fields of application
Positioning system for high-precision analysis, Laboratory analysis, Visual micrometer inspection, Fault detection under spatial radiation conditions, Industrial and pharmaceutical analysis, Display inspection
782335:009.26 | Rxj | Ryj | Rz | X | Y | Z | Ry1 | Ry2 | |||||||
Standard System |
| JE310 | JE310 | DT310 | KDT310 | KDT310 | PLT240 | DT310 | DT310 | ||||||
[mm; deg] | ± 3 | ± 3 | 365 | 100 | 100 | 230 | ± 45 | ± 45 | |||||||
Repeatability unidirectional | [µm; deg] | ± 0.006 | ± 0.006 | ± 0.005 | ± 2 | ± 2 | ± 3.9 | ± 0.005 | ± 0.005 | ||||||
Repeatability bidirectional | [µm; deg] | ± 0.01 | ± 0.01 | ± 0.007 | ± 2.5 | ± 2.5 | ± 4.4 | ± 0.007 | ± 0.007 | ||||||
[mm/s; deg/s] |
|
| 25 | 10 | 10 | 30 | 25 | 25 | |||||||
| Max. speed | [mm/s; deg/s] | 50 | 20 | 20 | 60 | 50 | 50 | ||||||||
Max. Load | [N] |
|
|
|
| 250 |
| 50 | 50 | ||||||
Motor |
| manual | manual | ||||||||||||
Drive |
| Micrometer Head | Micrometer Head | Belt | Belt
| Belt
| |||||||||
Guide |
|
| Thin section bearing | Profile rail
| Profile rail | Profile rail | Thin section bearing | Thin section bearing | |||||||
Feedback |
|
|
| Open Loop |
| Open Loop |
| Open Loop |
| Open Loop |
| Open loop |
| Open loop | |
| Length x width x height | [mm] | 500 x 940 x 810 (system) | 980 x 1400 x 1850 (system with rack and housing) | |||||||||||||
Used Standard Components
DT310-SM

KDT310-SM
PLT240-SM

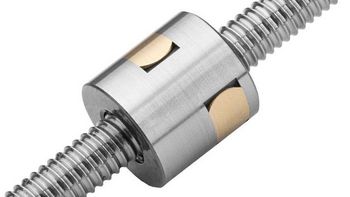
KGT 1214

Are you looking for a technical solution for your application?
Get your first 3D Design in a few days:

Katja Weißbach
Consulting
| T +49 (0) 351 88585-64 |

Francisco Samuel
Consulting &
Project Management
| T +49 (0) 351 88585-85 |

Our references


